Perspective Length Tool 
The Perspective Length Tool can be used to measure distances or object heights that are too far away to measure directly. This tool is self-contained, i.e., it does not use any external reference object and it does not provide a reference for other objects. Instead, you provide the reference measurements directly in this tool and it also computes the unknown distance.
Tool Usage
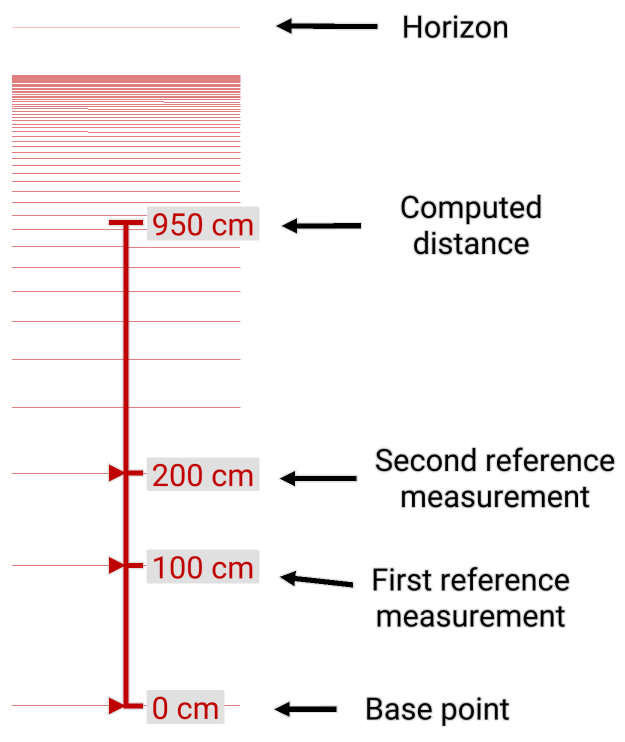
In order to use this tool, you have to know two reference distances along the line you want to measure. Figure 1 shows the tool display: at the bottom, there is the base point, which defines the origin for measurement. The value is fixed to zero. Above the base point, there are two reference measurements (100cm and 200cm in the picture) that you have to enter and position correctly in the image. Based on these inputs, ImageMeter computes the distance that is shown on top (950cm).
Note that the three reference points are indicated with a small triangle on the left side of the line, while the point with the computed distance is drawn with a plain line. The point that you want to compute, does not have to be at the very top. You can also move them between the reference measurements, or even below the base point (resulting in a negative distance).
The thin horizontal lines that are also drawn by the tool indicate equal distances (multiples of the first reference distance). You can use them for checking visually whether everything is aligned accurately. At large distances, many of those lines are drawn close to each other because of the perspective. For this reason, very distant lines are not drawn anymore, but there is an additional, final line that denotes the horizont (infinite distance). Clearly, moving the measurement point above the horizont line will not give you a valid measurement.
Examples
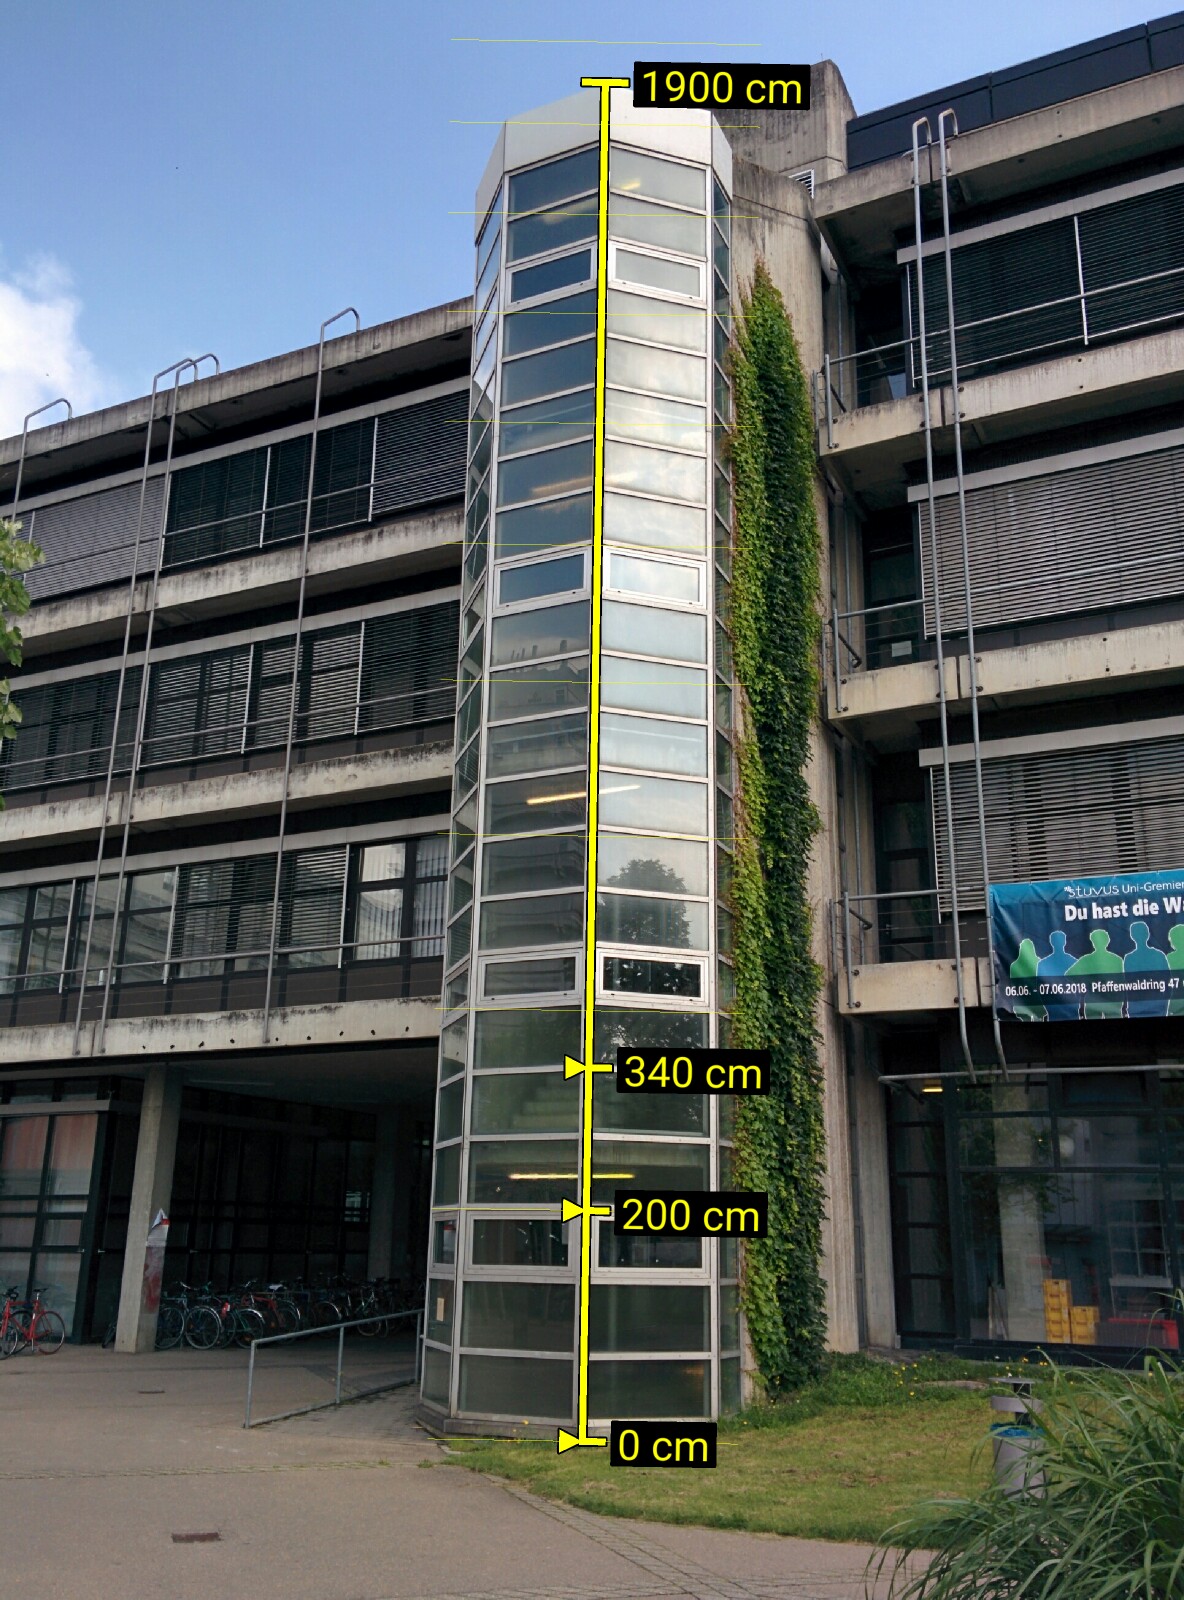
Figure 2 show an example where the tool is used to measure a building height. Obviously, we place the base point (0cm) at the ground level and add the two reference heights (200cm and 340cm) at positions that are clearly visible in the image. The total building height (1900cm) is computed automatically.
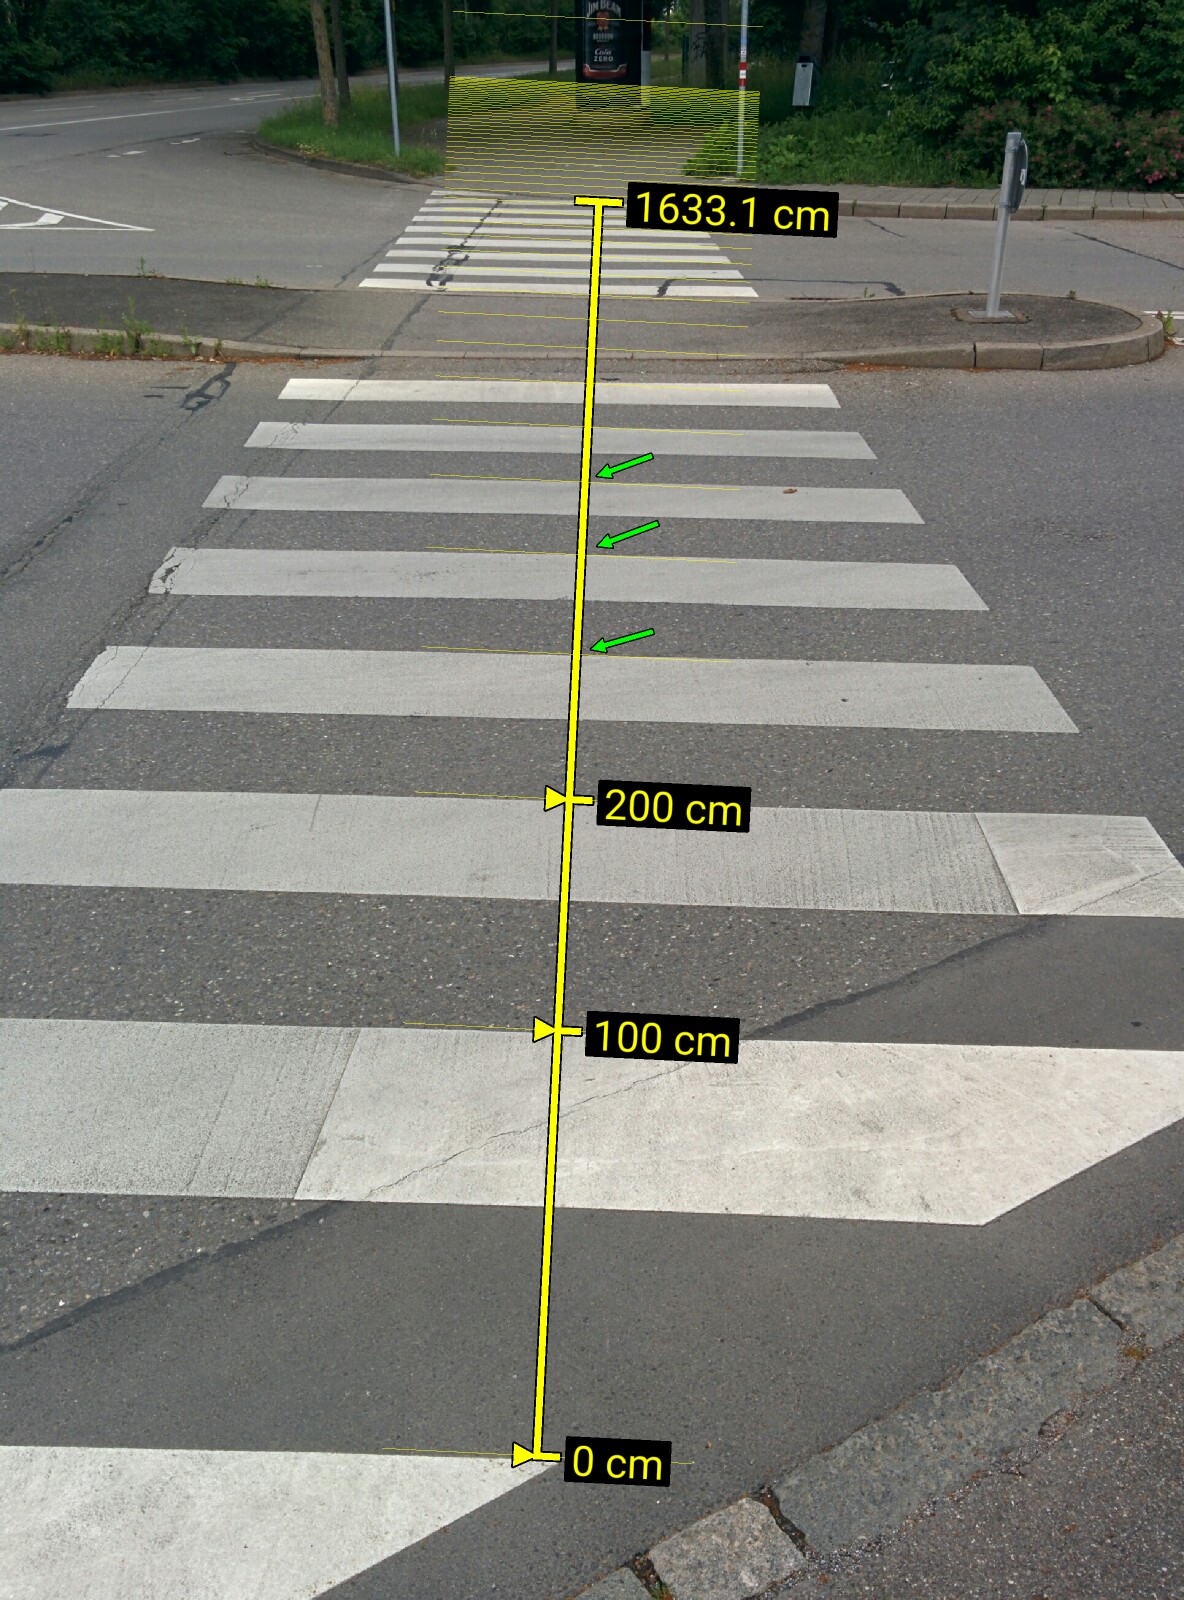
Figure 3 shows the measurement of a street width based on the width of the stripes of a pedestrian crossing. As those stripes usually (in Germany) have a width of 50cm with a 50cm gap, we can use the distance from one stripe to the next as reference distance (100cm). If aligned correctly, the horizontal marker lines of the tool should align well with the other pedestrian stripes. This can be seen in Figure 3 (indicated with the small green arrows). You may have to view the image at full resolution to see this clearly.
Usage Advice
When measuring large distances, the perspective distortion might make the measurement very sensitive to small changes in the point placement. This can be seen in Figure 1: above a distance of about 10m, the lines visualizing the 100cm steps come very close and a difference of only a few pixels may result in large changes in the measured distance. This situation should be avoided by taking the photo such that perspective distortion is reduced as much as possible and by placing the reference points as far apart as possible.